East Runton Caravan Storage
Advice
Storing your caravan
Please make sure the unit is displaying a current registration number and inform us as soon as possible of any changes in the registration number or contact details.
Please park your caravan as straight as possible on your allocated plot, with the jockey wheel on the numbered slab to enable us to get our mower safely between the units.
Make sure all corner steadies are down, chock the wheels and leave the handbrake off (to prevent brake seizure over long storage periods).
Ensure that all gas cylinder valves are closed off.
Remove all food and perishable items from the refrigerator and leave the door open or on the secondary catch and empty all waste bins.
Close and lock all windows taking special care to make sure all Hiki roof lights and other roof vents are closed and secure, close and lock all outside locker doors, and Lock the caravan door.
Ensure that all hitch locks and wheel clamps are fitted correctly and securely, and keys/security tags are kept in a safe place.
When taking the unit out of storage please leave a board with your name or registration number on your pitch, and remember to sign your unit out at the security barrier.
Additional Winter Precautions
Drain the water system and hot water cylinder including the freshwater inboard tank (if fitted) and leave all taps open (to prevent frost damage), If you have a Carver Crystal system remove your water filter cartridge, Clean out and drain thoroughly any water carriers and waste containers, Close all water inlet and waste outlet points to prevent any bugs and insects entering. Drain the toilet flush, Empty and rinse out the toilet cassette and coat the seals and blade with proprietary spray to prevent seals from sticking.
Disconnect the leisure battery (unless any alarms rely on the battery) to prevent the battery from discharging over long periods, and if possible take it home and store it somewhere dry and frost-free, Use a battery charger periodically (about once every eight weeks) to keep it topped up, Spray the 12N & 12S plugs with a proprietary water dispersal spray.
Do not block up any of the air vents in cupboards and lockers, air circulation is vital and any damp problems will only escalate without air circulation. Stand the seat cushions on end to allow the air to circulate around them, any bedding, sleeping bags, towels and clothing should really be removed and taken home.
Placing moisture traps in the caravan will help combat any dampness that may develop, these can be checked and recharged if necessary when you check on the caravan periodically.
Make sure any tracker/security alarm batteries are fully charged and operational. Remove all smoke alarm batteries for the winter.
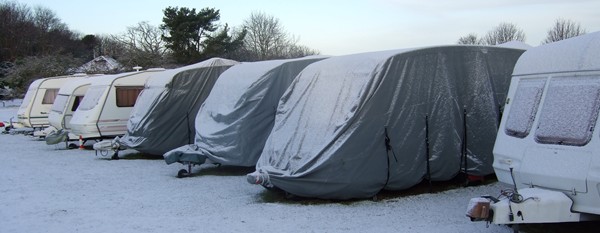
Wash the exterior of the caravan with a quality caravan cleaner, when the caravan is dry you can place a winter cover over it, alternatively, put a coat of over-wintering fluid on it which will give it a protective coat and makes it much easier to wash at the start of the new season.
Please Note
We welcome winter covers as long as they are the correct size for your caravan and secured correctly, NO tarpaulins or plastic sheets please, as these WILL become detached over the winter period and can cause damage not only to your own van but to others too. A coat of over-wintering fluid and no winter cover is better than a plastic sheet or tarpaulin.
New to Caravanning
If you are new to caravanning or just need a refresh, we are happy to offer advice on: reversing your caravan, coupling and uncoupling your caravan to your car, levelling and setting up your caravan, and winterising your caravan.
Reversing your Caravan
Reversing a caravan can be a tricky operation if you are not familiar with it, the caravan turns in the opposite direction to your steering.
Take your time, and manoeuvre slowly.
If you are not sure to start with, try holding the bottom of the steering wheel and the caravan will turn in the direction you steer.
If possible try to approach the pitch you are going to reverse into on your driver’s side, Place a mark on the pitch where you want the caravan wheel to be, this will act as a guide that you can use to reverse the caravan wheel onto the marker, either by looking over your shoulder or from your overtaking mirror, i.e. a slab or a white piece of board.
Remember to take your time, and manoeuvre slowly, that way you will have more control of your caravan, If you are on your own and not sure where the back of your caravan is, stop, and step out of the vehicle and walk around to see where you are heading.
If you have someone with you have the passenger window open, and get them to stand to the side of the vehicle to watch the blind side of the caravan, to make sure you don’t get too close to the unit next to you.
Turn your wheel in the opposite direction you want the caravan to go, (try holding the bottom of the steering wheel and the caravan will turn in the same direction), don’t try to oversteer, it only requires small movements of the steering wheel.
Steer the caravan’s wheel towards your marker, don’t try to turn too sharply it will only cause the caravan to jack-knife possibly damaging your van and car, if it starts to veer off course, pull forwards and try again.
Once the caravan starts turning in the direction you want it to go, follow it around gently with your steering wheel.
If your caravan is a single axle and it’s not straight when your wheel is on your marker, don’t worry, just chock the wheel and just push the front of the van round until the jockey wheel is on the numbered slab.
Remember, take it slowly, and like all things it takes practice.
Caravan Tyres
When checking your caravan tyres before your journey, always check that they are inflated to the correct pressure. This can be found in your caravan handbook. You should also check that the wheel nuts are set to the correct torque. This should also be done at regular intervals,
In Great Britain, the law states that there should be a minimum tread depth of 1.6mm in a continuous band throughout the central three-quarters of the tread width throughout the whole of the circumference. However, if you are taking your caravan abroad you need to check the law for the relevant country you are visiting (or passing through). In some European countries, the minimum tread depth is 2mm.
Check your tyres regularly but particularly when the caravan has not been used for some time. Vehicles such as caravans
or trailer tents, which are not used normally during winter, should be thoroughly inspected prior to re-use during the
summer months. Look particularly for any sign of age deterioration in the tyres such as sidewall cracking and
tyre deformation. Tyres on a stationary vehicle, particularly if parked in coastal areas, always age more quickly than
those in regular and frequent use. If your caravan/trailer tent is going to stand for any length of time, it is wise to cover the
tyres and shield them from direct sunlight and if possible jack the weight off them.
Maintain the correct tyre pressure which will minimise the chances of sidewall damage and turn the tyre occasionally to prevent flat surfaces. Cleaning with caravan shampoo will stop grime from damaging the surface and avoid using pressure washers directly onto rubber because the force of the water can degrade the rubber and cause problems when you’re on the road.
It is recommended that caravan tyres are changed when they reach five years old and should not be used beyond seven years old.
How old are my tyres
It is very simple to find out how old your caravan’s tyres are. The date of manufacture is shown on the sidewall of all caravan tyres. It forms the last three or four numbers at the end of the DOT (Department of Transport) code, which is found close to the wheel rim.
Tyres made between 1990 and 1999 ended with a three-digit code followed by a triangle and indicate the month and year in which the tyre was made.For example:
DOT A87C DEF 699.
This shows that the tyre was made during June (the sixth month) of 1999.
Tyres manufactured from 2000 onward are branded with a four-digit code, which is used to show the week and year.
DOT 5MNY EXH 3611.
This example indicates the tyre was manufactured in the 36th week of 2011.
A small number of tyres may not have the DOT code, but in these cases, the date of manufacture may still be shown elsewhere on the tyre, for instance, if you see as a separate group of letters 4202 that will indicate the 42nd week of 2002.